
Use Raspberry Pi as Torrent Download Server with transmission
Yesterday, openSUSE 12.3 was released. I wanted to help on seeding files before the release. So I decided to create a seedbox that will work 24/7, at least the first critical hours. Again Raspberry Pi was the solution. I used part of my previous tutorial, how to install owncloud. Since those are kind of same, I'll use some parts from previous tutorial.
I used:
1. Raspberry Pi
2. Ethernet Cable
3. USB micro plugged on Router
4. 8GB SD card
Check out the conectivity:

1. Download Raspbian. You can visit Raspberry Pi download page or you can download direct 2013-02-09-wheezy-raspbian.zip (this can be changed). Then unzip it.
2. Install Raspbian and update it.
- Find the SD card:
df -h
or better
cat /proc/partitions
eg it's /dev/sdb1.
- Unmount the SD
umount /dev/sdb1
- Copy the image to your SD (don't forget to add sudo before):
sudo dd if=2013-02-09-wheezy-raspbian.img of=/dev/sdb bs=1M;sync
You're all set. Don't forget the user-pass:
user: pi pass: raspberry
3. Boot your Raspberry Pi
You should proceed with update (you can login using ssh with the command ssh root@RASPBERRY's IP):
sudo apt-get update && apt-get dist-upgrade
If you want to get rid of the GUI (since you will use only terminal), follow the steps (as described here):
sudo apt-get update
# Remove libx11-6 to remove x11 and all dependent packages (anything GUI related, basically)
sudo apt-get remove libx11-6 libgtk-3-common xkb-data lxde-icon-theme raspberrypi-artwork penguinspuzzle
# Clean up redundant packages
sudo apt-get autoremove
# Purge config files for removed packages
sudo su
dpkg -l | awk '/^rc/ {print $2}' | xargs dpkg --purge
Also if you want to set the memory usage so that there is only bare minimum used for the graphics, you need to copy the required memory split file to start.elf, eg. arm240_start.elf would give you 240MB RAM with 16MB for the GPU.
4. Next step, set static IP (as described here). Normally, if you plug once your Raspberry Pi, the IP doesn't change. The problem is when you have your router restarted. Here what you have to change:
- Edit the file /etc/network/interfaces
sudo nano /etc/network/interfaces
- Find the line and change it:
auto eth0
iface eth0 inet static
address 192.168.1.200
netmask 255.255.255.0
gateway 192.168.1.1
iface eth0 inet static
address 192.168.1.200
netmask 255.255.255.0
gateway 192.168.1.1
Use IP 192.168.1.200, near the end of the DHCP IPs that the router provide you.
To save, press Ctrl+X key on keyboard and then ‘Y’ Enter to exit the text editor.
5. If you want to have access from outside, you should have a router with Dynamic DNS for example http://www.no-ip.org. Check what your router for that. You'll also need to forward your external IP to your Raspi's IP address on your LAN (step 4). It depends on your router. Usually there's NAT, or Virtual server or Port forward. Use the port 80.
6. Change raspberry pi default password.
Open terminal under the user you want to change the password. Don't forget there are 2 users (pi and root).
Use the command passwd and you'll be prompted for the current password first and then the new password. You will see the following result if you successfully change the password. To change root's password, you must use the command:
sudo su
Result after change the password:
--------------------------------------
Changing password for pi.
(current) UNIX password:
Enter new UNIX password:
Retype new UNIX password:
passwd: password updated successfully
--------------------------------------
Changing password for pi.
(current) UNIX password:
Enter new UNIX password:
Retype new UNIX password:
passwd: password updated successfully
--------------------------------------
7. Raspnian uses 2GB of the SD card. Now you should mount (automatically) the rest GB to store your data (I used the directions described here).
First check the partitions:
cat /proc/partitions
You should see the result:
major minor #blocks name
179 0 7761920 mmcblk0
179 1 57344 mmcblk0p1
179 2 1832960 mmcblk0p2
179 3 5867520 mmcblk0p3
179 0 7761920 mmcblk0
179 1 57344 mmcblk0p1
179 2 1832960 mmcblk0p2
179 3 5867520 mmcblk0p3
You can use fdisk to create the parititon. Use th following command and press the following letters:
sudo fdisk /dev/mmcblk0p3
n
p
press enter
press enter
w
n
p
press enter
press enter
w
Now format the partition:
sudo mkfs.ext4 /dev/mmcblk0p3
Create a directory to mount the partition:
sudo mkdir /media/data
Now add partition to fstab to automount everytime you reboot.
sudo nano /etc/fstab
# and add the following line
/dev/mmcblk0p3 /media/data defaults 1 0
# and add the following line
/dev/mmcblk0p3 /media/data defaults 1 0
8. Now it's time to install transmission. I followed the turorial from here.
First install transmission:
sudo apt-get install transmission-daemon
Create 2 partitions for incomplete torrents and completed torrents:
sudo mkdir -p /media/data/incomplete && sudo mkdir /media/data/complete
Configure proper permissions for transmission:
sudo usermod -a -G debian-transmission pi
sudo chgrp debian-transmission /media/data/incomplete
sudo chgrp debian-transmission /media/data/complete
sudo chmod 770 /media/data/incomplete
sudo chmod 777 /media/data/complete
sudo chgrp debian-transmission /media/data/incomplete
sudo chgrp debian-transmission /media/data/complete
sudo chmod 770 /media/data/incomplete
sudo chmod 777 /media/data/complete
Now, reload transmission daemon
sudo service transmission-daemon reload
Now edit transmission settings.json file using:
sudo nano /etc/transmission-daemon/settings.json
Here is the content of your file:
{
"alt-speed-down": 50,
"alt-speed-enabled": false,
"alt-speed-time-begin": 540,
"alt-speed-time-day": 127,
"alt-speed-time-enabled": false,
"alt-speed-time-end": 1020,
"alt-speed-up": 50,
"bind-address-ipv4": "0.0.0.0",
"bind-address-ipv6": "::",
"blocklist-enabled": false,
"blocklist-url": "http://www.example.com/blocklist",
"cache-size-mb": 4,
"dht-enabled": false,
"download-dir": "/media/data/complete",
"download-limit": 100,
"download-limit-enabled": 0,
"download-queue-enabled": true,
"download-queue-size": 5,
"encryption": 1,
"idle-seeding-limit": 30,
"idle-seeding-limit-enabled": false,
"incomplete-dir": "/media/data/incomplete",
"incomplete-dir-enabled": true,
"lpd-enabled": false,
"max-peers-global": 200,
"message-level": 2,
"peer-congestion-algorithm": "",
"peer-limit-global": 91,
"peer-limit-per-torrent": 150,
"peer-port": 51413,
"peer-port-random-high": 65535,
"peer-port-random-low": 49152,
"peer-port-random-on-start": false,
"peer-socket-tos": "default",
"pex-enabled": false,
"port-forwarding-enabled": true,
"preallocation": 1,
"prefetch-enabled": 1,
"queue-stalled-enabled": true,
"queue-stalled-minutes": 30,
"ratio-limit": 2,
"ratio-limit-enabled": false,
"rename-partial-files": true,
"rpc-authentication-required": true,
"rpc-bind-address": "0.0.0.0",
"rpc-enabled": true,
"rpc-password": "{2dc2c41724aab07ccc301e97f56360cb35f8ba1fGVVrdHDX",
"rpc-port": 9091,
"rpc-url": "/transmission/",
"rpc-username": "transmission",
"rpc-whitelist": "*.*.*.*",
"rpc-whitelist-enabled": false,
"scrape-paused-torrents-enabled": true,
"script-torrent-done-enabled": false,
"script-torrent-done-filename": "",
"seed-queue-enabled": false,
"seed-queue-size": 10,
"speed-limit-down": 250,
"speed-limit-down-enabled": true,
"speed-limit-up": 0,
"speed-limit-up-enabled": true,
"start-added-torrents": true,
"trash-original-torrent-files": false,
"umask": 18,
"upload-limit": 100,
"upload-limit-enabled": 0,
"upload-slots-per-torrent": 14,
"utp-enabled": true
}
After saving the settings, reload and restart transmission daemon.
sudo service transmission-daemon reload
sudo service transmission-daemon restart
sudo service transmission-daemon restart
You're done. All you have to do is to open your browser to http://RASPI.IP.ADDRESS:9091/ and use the login/password (default for above config transmission/transmission)


This setup worked fine for some time but resulted in frequent hangs if left running for longer periods. To solve the RaspberryPi Kernel panic issue when using transmission downloading make the following changes and reboot your RasPi:
Edit /boot/cmdline.txt and add “smsc95xx.turbo_mode=N” to it.
Edit /etc/sysctl.conf and change “vm.min_free_kbytes =16384″ (from 8MB to 16MB).
9. OK, you installed torrent server. How can you access the downloaded files from your computer? Well it's easy. Just install SAMBA. For that reason, I followed the tutorial here.
First of all, install SAMBA.
sudo apt-get install samba samba-common-bin
Then all you have to do is to change SAMBA configuration file.
sudo nano /etc/samba/smb.conf
Just add the following lines:
[Seedbox]
comment = Public Shares
path = /media/data/complete
writeable = Yes
only guest = Yes
create mask = 0777
directory mask = 0777
browseable = Yes
public = yes
comment = Public Shares
path = /media/data/complete
writeable = Yes
only guest = Yes
create mask = 0777
directory mask = 0777
browseable = Yes
public = yes
You should restart SAMBA or you can reboot your Pi.
sudo service samba restart
Now you can access your Pi from Nautilus (check here how to do that).
10. Alternative, you can can use the script I found from this site:
#!/usr/bin/env bash
#
#
# Setting Up XBMC for Raspberry Pi Robbie Style
#
#
#
#
echo "[+] Updating packages"
sudo apt-get update
echo "[+] Installing Usefull Tools"
sudo wget http://ftp.debian.org/debian/pool/non-free/u/unrar-nonfree/unrar_4.1.4-1_armhf.deb
sudo dpkg -i unrar_4.1.4-1_armhf.deb
sudo apt-get -y install libxml-dom-perL libxml-simple-perl uudeview cksfv build-essential git-core checkinstall libssl-dev rtmpdump locate
echo "[+] Installing Transmission packages"
sudo apt-get -y install transmission-daemon avahi-daemon
echo "[+] Configuring Transmission"
sudo service transmission-daemon stop
sudo sed -i -re 's/(rpc-authentication-required\":\ )([a-z]+)*/\1false/g' /etc/transmission-daemon/settings.json
sudo sed -i -re 's/(rpc-whitelist-enabled\":\ )([a-z]+)*/\1false/g' /etc/transmission-daemon/settings.json
sudo sed -i -re 's/(download-dir\":\ )([a-z]+)*(.*)/\1\"\/srv\/media\",/g' /etc/transmission-daemon/settings.json
sudo service transmission-daemon start
echo "[+] Setting up public Samba share"
sudo apt-get -y install samba
sudo mkdir /srv/media
sudo chown debian-transmission /srv/media
sudo echo "[public]
comment = Public Shares
browsable = yes
path = /srv/media
public = yes
writable = yes
guest ok = yes" >> /etc/samba/smb.conf
sudo service samba restart
echo "[+] Finished.... hopefully all went well"
#
#
# Setting Up XBMC for Raspberry Pi Robbie Style
#
#
#
#
echo "[+] Updating packages"
sudo apt-get update
echo "[+] Installing Usefull Tools"
sudo wget http://ftp.debian.org/debian/pool/non-free/u/unrar-nonfree/unrar_4.1.4-1_armhf.deb
sudo dpkg -i unrar_4.1.4-1_armhf.deb
sudo apt-get -y install libxml-dom-perL libxml-simple-perl uudeview cksfv build-essential git-core checkinstall libssl-dev rtmpdump locate
echo "[+] Installing Transmission packages"
sudo apt-get -y install transmission-daemon avahi-daemon
echo "[+] Configuring Transmission"
sudo service transmission-daemon stop
sudo sed -i -re 's/(rpc-authentication-required\":\ )([a-z]+)*/\1false/g' /etc/transmission-daemon/settings.json
sudo sed -i -re 's/(rpc-whitelist-enabled\":\ )([a-z]+)*/\1false/g' /etc/transmission-daemon/settings.json
sudo sed -i -re 's/(download-dir\":\ )([a-z]+)*(.*)/\1\"\/srv\/media\",/g' /etc/transmission-daemon/settings.json
sudo service transmission-daemon start
echo "[+] Setting up public Samba share"
sudo apt-get -y install samba
sudo mkdir /srv/media
sudo chown debian-transmission /srv/media
sudo echo "[public]
comment = Public Shares
browsable = yes
path = /srv/media
public = yes
writable = yes
guest ok = yes" >> /etc/samba/smb.conf
sudo service samba restart
echo "[+] Finished.... hopefully all went well"
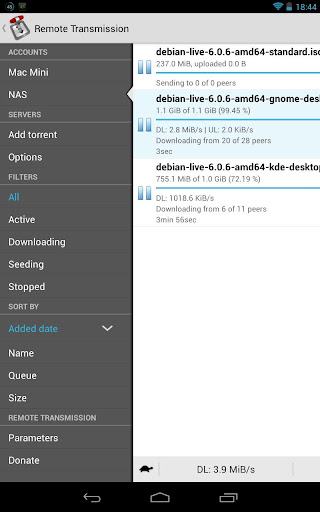
If you want to use it via android phone/tablet, you can use the program Remote Transmission
Let's say that the file is i your pi disk. You're not at home. How can you check it? Maybe the easiest way is to setup an FTP server. Maybe the best program is vsftpd. You can install it:
sudo apt-get install vsftpd
Now you should change few things:
sudo nano /etc/vsftpd.conf
And uncomment:
local_enable=YES
write_enable=YES
write_enable=YES
Restart the service and you're done:
sudo service vsftpd restart
Personally I use the program filezilla but you can also use the Firefox addon FireFTP.


καλησπέρα. πολύ καλός οδηγός. το έχω ακολουθήσει εκτός από το κομμάτι του ftp, έχω κάνει όλα τα υπόλοιπα και δουλεύει μια χαρά. από ένα άλλο μηχάνημα βλέπω το shared folder. σε περίπτωση που από windows μπω στον φάκελο που μοιράζει τα αρχεία, μπορώ να κάνω διαγραφή των αρχείων, αλλά όχι των υποφακέλων που δημιουργούνται κάποιες φορές.
ΑπάντησηΔιαγραφήΕμένα δεν μου δούλευε αυτό. Τα αρχεία τα έσβηνα μέσα από τον browser.
ΔιαγραφήΠροσπαθώ να περάσω το watch-dir ώστε να του πετάω τα αρχεία .torrent και να ξεκινά αυτόματα. Δυστυχώς δεν δείχνει να το αναγνωρίζει καν και θα ήθελα να ρωτήσω αν το έχεις καταφέρει.
ΑπάντησηΔιαγραφήΌχι, δεν το έχω κάνει.
Διαγραφή